Recipe: Braciola di Maiale con Pasta Aglio Olio

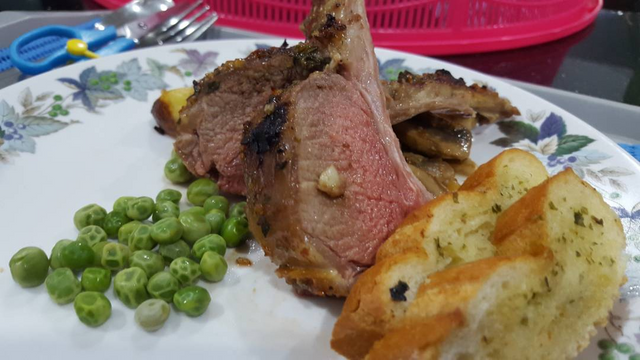
Braciola di Maiale con Pasta Aglio Olio means Garlic Oil Pasta with Pork Chop. I know I could have just called it garlic oil pasta but where’s the fun in that! (But then again, I don’t really know Italian so this could be very poorly translated.)

Ingredients

For Pork Chop

  • 2 Pork Chops
  • Butter
  • Salt
  • Pepper
  • Sprigs of Thyme

For Aglio Olio

  • 200g Spaghetti (Any other pasta will do)
  • 4 cloves of Garlic, thinly sliced
  • Generous amounts of Olive Oil
  • Chilli Flakes (I used leftovers from Domino’s Pizza)
  • White Wine
  • Parmesan
  • Parsley

Instructions

  1. We will start with preparation of the Aglio Olio first! Boil a pot of water and mix in some olive oil and salt. Then, stick your pasta in.
  2. Let the pasta cook until it becomes limp but not brittle.
  3. Drain the pasta but keep half a cup of Pasta water.
  4. Heat some olive oil over medium heat on a pan that can hold your pasta.
  5. Add your sliced garlic cloves in. Let them cook until lightly browned on the outside. This should take around 2 minutes.
  6. Add in your chilli flakes and cook for 30 seconds more.
  7. Add your reserved pasta water and bring it to boil.
  8. Add some salt and some white wine. Simmer for about 5 minutes, reducing it by a third.
  9. Add the pasta to the sauce and toss. Make sure to get the oil all over the pasta.
  10. Take the pan off the heat and add in your parmesan and parsley.
  11. Let the pasta rest for about 5 minutes to fully absorb the sauce.
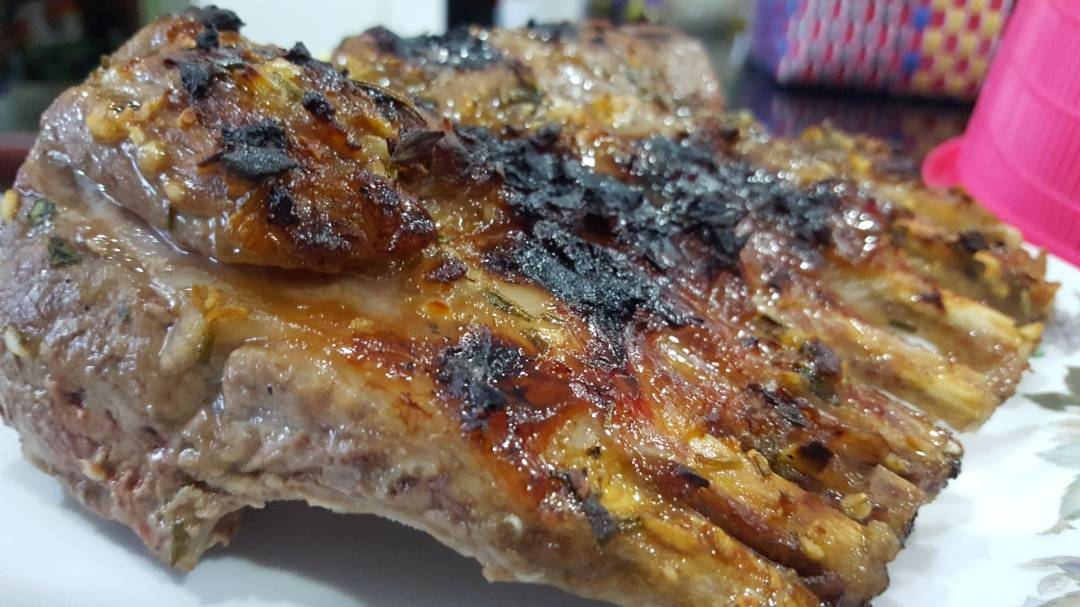
  12. While the pasta is resting, it is time to start preparing the pork chop! Start by seasoning it with salt and pepper.
  13. You can use the same pan to pan fry this pork chop so the garlic sauce residue can help add to the pork chop’s flavour. Heat it up and add a few globs of butter.
  14. Throw in the pork chop and sear it.
  15. Throw in some more butter and your thyme to make the pork chop extra juicy.
  16. Cook the pork chop until it becomes lightly browned. To check if it is cooked, make a small incision to check the redness of the center.
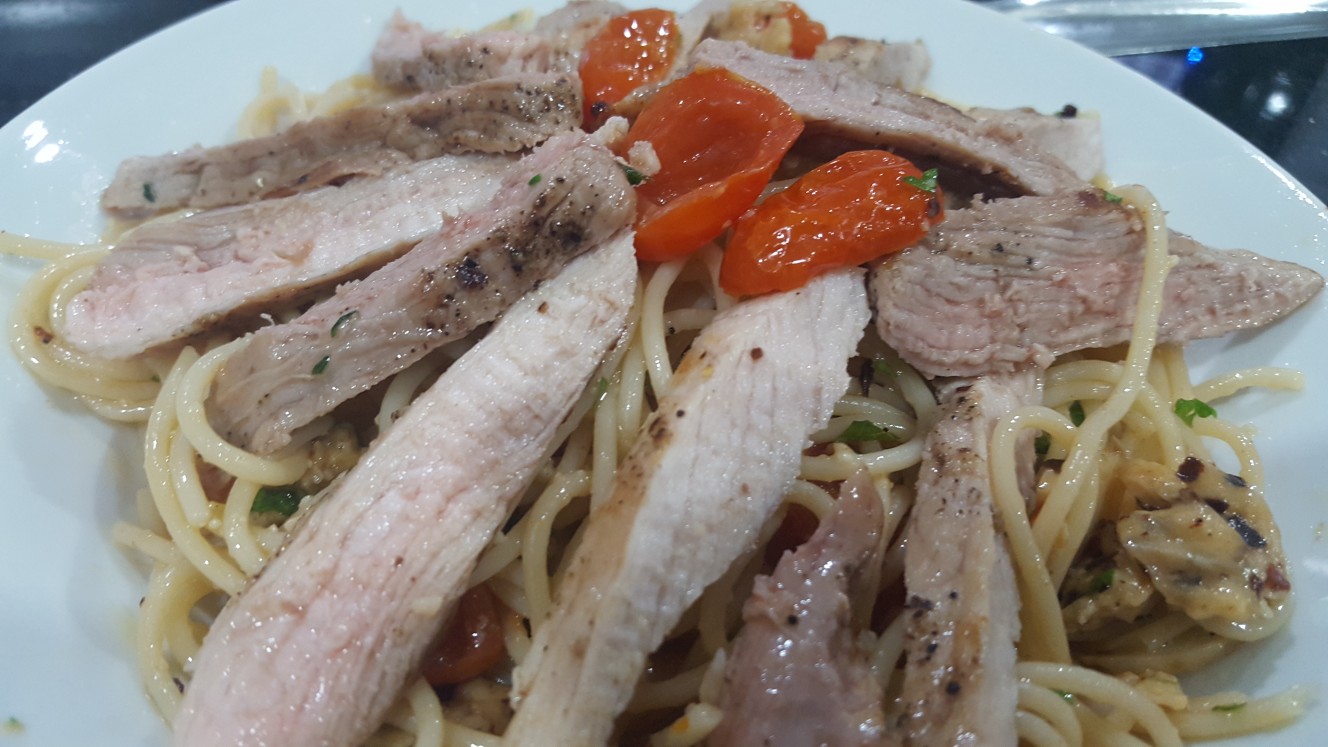
  17. Let the pork chop rest. Then, slice and serve on top of the Aglio Olio.
  18. You can serve the Aglio Olio with some grilled cherry tomatoes for extra flavour! Enjoy!

Recipe: Beef Wellington

This was one of the dishes I prepared for my late mother. She told me that she wanted to have beef wellington. The funny thing about that was that I have never ate or saw what a beef wellington was before this. Thus, I had to make this dish with no idea what it was supposed to look like or taste!

For this recipe, I decided to consult Gordon Ramsay’s version of the beef wellington as my base.

Ingredients

For the dish
1.1kg Chilled Beef Tenderloin
Olive Oil
500g Mixed Mushrooms (I got a random 3-in-1 pack)
A packet of Thyme leaves
2 slices of puff pastry
6 pieces of Spanish Parma Ham
2 eggs beaten together with a pinch of salt and a spoonful of water
Salt and Pepper

For the Red Wine Sauce
Olive Oil
180g beef trimmings (or, as I found it being called in the market, Soup Meat)
4 large shallots
Black Peppercorns
Bay leaf
A bunch of thyme
1 bottle of red wine (750ml)
1 carton of beef stock (300ml)

Instructions
Step 1: Finely chop up your mushrooms and shallots. Pluck the leaves off your thyme. Tip: By pinching the thyme and sliding down in the right direction (Either up or down, I am sure you can figure it out), you can ‘peel’ off most of the leaves easily.

Step 2: Sear your beef until it is brown on the outside and rare on the inside. This should take about a minute or two. Then, remove it from the pan and leave it to cool.

Step 3: Place your chopped mushrooms into a pan with some olive oil, some thyme leaves, some salt and some black pepper.

Step 4: Continue to cook until the mushrooms release all its juices and becomes a dry paste of sorts. It is known as a duxelle. Then, remove it from the pan and leave it to cool.

Step 5: Lay down a large sheet of cling wrap on your workspace.

Step 6: Lay down your Parma Ham in the center of the cling wrap. Try and spread out the ham to cover as much of the center as possible with some minor overlapping.

Step 7: Evenly spread the duxelle over the ham.

Step 8: Add some seasoning to your Beef Fillets. Then, put them on the duxelle. Then, using the cling film, wrap the Parma Ham around the fillets. Then, chill for around 30 minutes. During which, you’d want to start on the Red Wine Sauce (Refer below).

Step 9: Take out your puff pastries and brush on the egg wash on both sides of the pastry.

Step 10: Carefully place the beef wrap onto the puff pastry, removing the cling wrap.

Step 11: Stick it in the oven at 200C until the pastry puff is golden brown. Every few minutes, pull it out of the oven for a quick basting.

Step 12: Let it rest for 10 minutes out of the oven when deemed cooked. Then, you may carve it and serve with the Red Wine Sauce.

Red Wine Sauce

Step 1: Fry the beef trimmings until they are brown. Stir in your shallots, pepper, bay leaf and thyme. Continue to cook until it becomes a little brown.

Step 2: Add your red wine. Let it boil and reduce for a bit.

Step 3: Add your beef stock and bring to boil.

Step 4: Lower the heat and simmer for around 1 hour.

Step 5: Sift out the chunky bits with a sieve.

Step 6: Heat it up and add some potato starch to increase the thickness of the sauce. Then, add some more seasoning

The Result!

Recipe: Apple Risotto

Food Porn is the best way to describe Shokugeki no Soma. In Food Wars, great food tends to involve exploding clothes. As expected of an anime. Of course, since I was feeding family, the lack of exploding clothes is a good thing.

Today, I decided to recreate the dish in Episode 16 of the Anime (Chapter 42 in the manga). The battle between the titular character Soma and his father Joichiro, a challenge to create a rejuvenating breakfast dish for their 490th battle. The APPLE RISOTTO!

This recipe is based off the video from Feast of Fiction. Feel free to check out their recipe video!

Ingredients

250g arborio rice
2 apple (American Fuji)
1 large yellow onion
1/2 Stick of Butter
1/4 bottle of white wine
Half lemon of lemon juice
5 apples’ juice
1/2 bag grated parmesan cheese
Bacon
Pork Belly
Salt and pepper to taste


Instructions:

Rice:
Prep
Step 1: Chop up your onions and apples.
Step 2: Squeeze some lemon juice on the apples to add a zesty flavour to the dish while reducing browning.
Step 3: Squeeze your apples and sift out any floating bits.

Cooking
Step 1: Heat up your apple juice.
Step 2: On a separate pan, add 3/4 of your butter to the pan to melt.
Step 3: Add your onions and cook them till they are lightly browned.
Step 4: Add your Arborio Rice.
Step 5: Add in your white wine (Another alternative to consider is cooking sake but due to lack of availability I couldn’t try it) to add to the aroma and to prevent sticking.
Step 6: Once your rice is slightly transparent on the outside while maintaining a white center, start adding your apple juices one ladle at a time, stirring for a few minutes between each addition.
Step 7: Make sure that you aren’t making the rice dry. If you run out of apple juice, you can make some stock soup or add hot water to the rice. Likewise, don’t put too much liquid as you don’t want a risotto porridge!
Step 8: Add in another drizzle of white wine and your remaining butter and let the rice cook.
Step 9: When the rice is cooked, add in your apple chunks and continue stirring.
Step 10: Add in your parmesan. It helps balance out the flavour and helps to hold everything together.
Step 11: Add some salt to taste.
Step 12: Turn off the heat but keep the rice in the pan so the residue heat will cook it further without burning anything.

Pork Belly and Bacon

Step 1: Marinate the Pork Belly in Salt and Pepper.
Step 2: Grill it under high heat.
Step 3: Cut a slice to check if you have undercooked or overcooked it.
Step 4: Put in the bacon and cook it with the leftover oil from the pork belly. Do not add extra oil.

My rendition of the Apple Risotto

Recipe: Summer in Winter Chicken

This isn’t the prettiest dish I’ve made but I guarantee that it still tastes amazing! This is a dish I made a long time ago successfully. So, I wanted to recapture that dish. However, I wanted to make it extra rich so I threw in a bunch of extra cheese and called it a day.

The idea behind this dish is that it is meant to heat you up on a cooling day. It was a bit redundant to have that purpose in a tropical country but I guess it is the thought that counts.

Ingredients

  • 2 Chicken Breast
  • 2 Chicken Thigh
  • 3 tbsp Pesto (Pine Nuts, Basil, Parmesan, Garlic, Olive Oil. Blended together)
  • 2 tbsp Mascarpone
  • A sprinkle of Mozarella Cheese
  • 3 tbsp of Creme Fraiche
  • Butter/Olive Oil
  • 200g Cherry Tomatoes
  • Basil Leaves

Instructions

  1. Heat the olive oil/butter in a large pan. Marinate your chicken with salt and pepper. Halve your cherry tomatoes.
  2. Place your chicken in the pan and cook thoroughly. This should take 10-15 minutes for each side depending on how cooked you like your chicken. To test how cooked your chicken is, make a small incision where the meat is at its deepest. White means it is cooked, pink or red means it is not cooked yet. You wouldn’t want to overcook it as the texture would be terrible and you wouldn’t want to undercook it because… salmonella.
  3. Throw in the cherry tomatoes and stir. Let it cook until softened.
  4. Reduce the heat. Add the pesto, mascarpone, creme fraiche and mozzarella. Stir until it becomes a sauce.
  5. Sprinkle in some basil leaves and stir.
  6. Serve with rice, garlic bread or mashed potatoes.

Recipe: Cauliflower Cheese

If you like cheese, you will love this dish! Cauliflower cheese is an easy to make but very tasty side that can complement any meal. Heck, if you want, you can even have it as your main!

Ingredients:
1 Head of Cauliflower
¼ Bar of Butter
4 tbsp flour
Milk
Salt
Pepper
Chicken Stock
Mustard
1 Bag of Parmesan Cheese
Half Bag of Cheddar Cheese

Instructions:
Step 1: Roughly chop up your cauliflower into large bits. Small bits would end up breaking apart.
Step 2: Parboil your cauliflower until it is slightly soft. Make sure it isn’t too soft or soggy.
Step 3: Start making your roux by melting your butter in the pot.
Step 4: Stir in your flour bit by bit until it looks crumbly.
Step 5: Take pan off heat to prevent burning.
Step 6: Add milk bit by bit while whisking the mixture. Do this until it is creamy and has no noticeable crumbs.
Step 7: Put the pot back on heat.
Step 8: Add your seasoning: mix in your salt, pepper and chicken stock.
Step 9: Add some colour and extra flavour to your dish by adding the secret ingredient – Mustard.
Step 10: Continue stirring until the sauce is nice and thick. If you think it is too thick, add more milk. Don’t add too much as you don’t want cheese soup.
Step 11: Add half a bag of parmesan cheese into the mixture and stir. Then, taste it. If you think it needs more cheese, throw in the other half bag in there.
Step 12: Stir in the cauliflower chunks.
Step 13: Transfer everything to an oven proof dish and cover the top layer with cheddar.
Step 14: Grill everything until the cheddar on top is brown and bubbly.
Step 15: Serve with something fun like Steak or Bread.

Recipe: Honey Glazed Rack of Lamb

Ingredients

Lamb Rack
Honey
Dijon Mustard
Garlic
Thyme
Rosemary
Potato
Carrot
Celery
Salt and Pepper

Instructions

Vegetables

  1. You would want to prepare your vegetables first. So, chop up the potatoes, carrots and celeries in large chunks.
  2. Douse it with some olive oil, rosemary and minced garlic. Then, mix.
  3. Set aside to be placed on the baking tray as the veggies will be used to help give an additional aroma to the rack.

Rack of Lamb

  1. Give the Rack a tiny bath of salt and pepper. Let it rest for 10 minutes.
  2. Heat up a pan and toss in some olive oil.
  3. Sear the Rack! Brown it a little but don’t cook it through.
  4. Set it aside and let it cool.
  5. Mix your honey, mustard, garlic, thyme and rosemary into a marinate mixture.
  6. Put your rack on the baking tray on top the veggies.
  7. Scoop it up with a teaspoon and pour the mixtures all over the rack, making sure to get every nook and cranny. Don’t worry about dripping on the vegetables as it helps give the veggies extra flavours.
  8. While letting the rack marinate, preheat your oven to 200C.
  9. When the oven is nice and hot, put your baking tray in!
  10. Let it bake for around 20 minutes or when it looks a little cooked.
  11. Then, switch your oven to grill to give the outside a nice crispy texture.
  12. When slightly blackened, take your rack out and check on your veggies.
  13. If the veggies aren’t cooked enough, mix them together with the sauce that dripped from the lamb and stick it back in!
  14. When all looks good, slice it up and serve with some garlic bread and peas!
An Individual Serving with Garlic Bread and Peas

Recipe: Honey Baked Salmon

This recipe comes from waaaaay down south. It was originally made by my Grandmother from New Zealand! We had this dish many years ago and my late mum loved it! The last time I made this recipe was when she was still around. However, I can testify that this recipe works!

Note: This recipe will not have specific measurements as they are to be adjusted depending on your portioning. Our portioning served around 4 people (with some leftovers).

Ingredients
Salmon with skin (deboned)
Lemon Wedges
Bay Leaves
Honey (Manuka, if you can find/afford it)
Rosemary
Garlic
Thyme

Instructions
Step 1: Mince your garlic. Pluck and chop your rosemary and thyme. Slice your lemon into thin wedges.
Step 2: Slice slits into your Salmon. Make it cut all the way through but don’t breach the skin.
Step 3: Stick the lemon wedges into the slits with the bay leaves.
Step 4: Sprinkle with the garlic, rosemary and thyme. Add salt to taste.
Step 5: Drizzle the whole thing with a generous amount of honey and set aside to chill for 30 minutes. Then, take out and let it go down to room temperature 30 minutes before placing it into the oven.
Step 6: While waiting for the salmon to go down to room temperature, preheat the oven to 220C.
Step 7: Stick it in and cook it for 20 minutes, or until cooked. Then, serve with Garlic Bread or some other carbohydrate.

Design a site like this with WordPress.com
Get started